Connect Cursor, VS Code & others
Connect Cursor, VS Code, Windsurf or any other MCP client to your site.
On this page
Code editors and other MCP clients connect to your site with an API key. You paste a short configuration into the app, with your site's Server URL and the key. Urmi shows the exact snippet for each app, ready to copy.
Go to Urmi → AI & MCP → Connect a client and pick the app on the left. The MCP server must be on: it is off until an administrator turns it on. See Turn on the MCP server.
Create a key first
Every app on this page uses an API key. On the app's panel, click Create key, choose the permissions and click Create key. The new key is inserted into the snippets on the page, so you can copy them as they are.
The key is shown only once. If you leave the page, the snippets show YOUR_API_KEY again: replace it with your key, or create a new one. See API keys & scopes.
A key gives access to your site. Keep configuration files that contain a key out of Git and other shared folders. Put them in your user settings rather than in a project.
Cursor
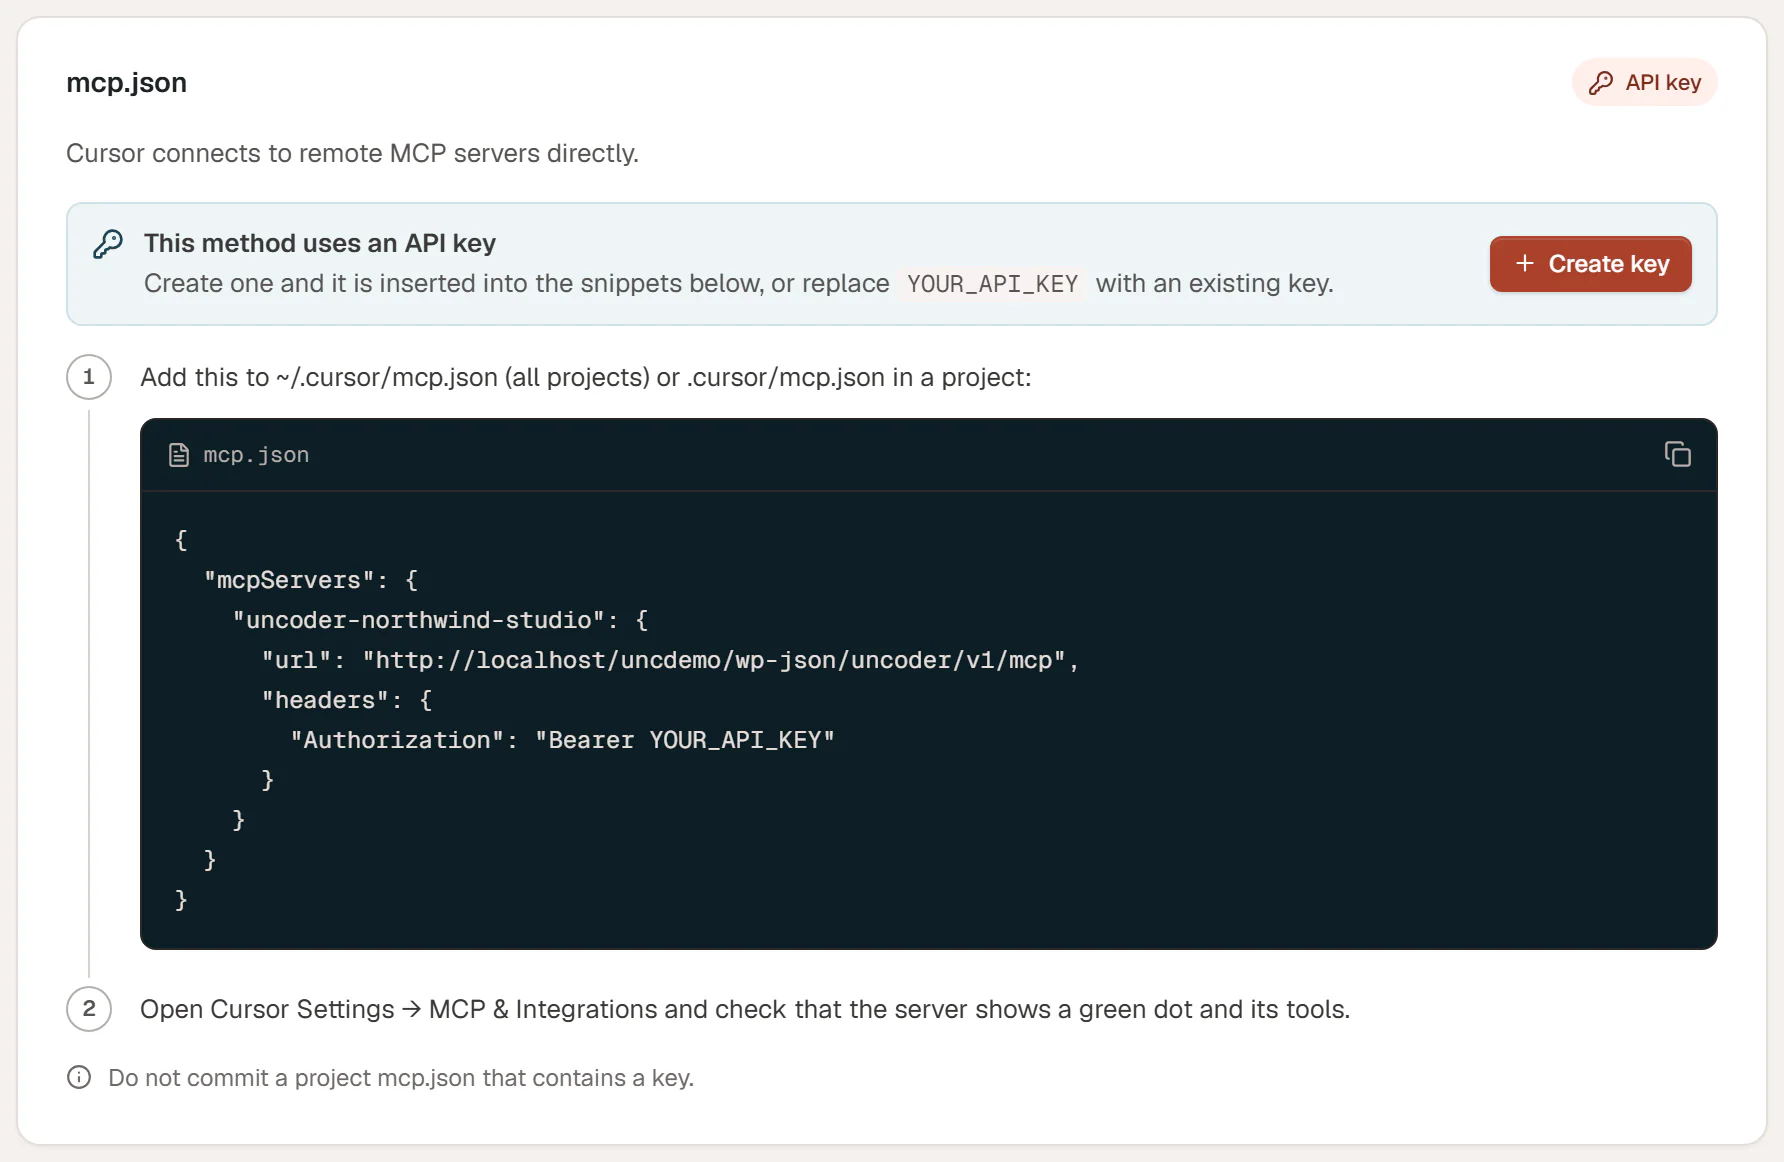
Cursor connects to your site directly.
Add the server to mcp.json
Open
~/.cursor/mcp.jsonto use your site in all projects, or.cursor/mcp.jsoninside one project. Add the snippet from Urmi:JSONmcp.json{ "mcpServers": { "urmi-my-site": { "url": "https://example.com/wp-json/urmi/v1/mcp", "headers": { "Authorization": "Bearer YOUR_API_KEY" } } } }Check the connection
Open Cursor Settings → MCP & Integrations. Your site's server should show a green dot and its list of tools.
Do not commit a project mcp.json that contains a key.
VS Code
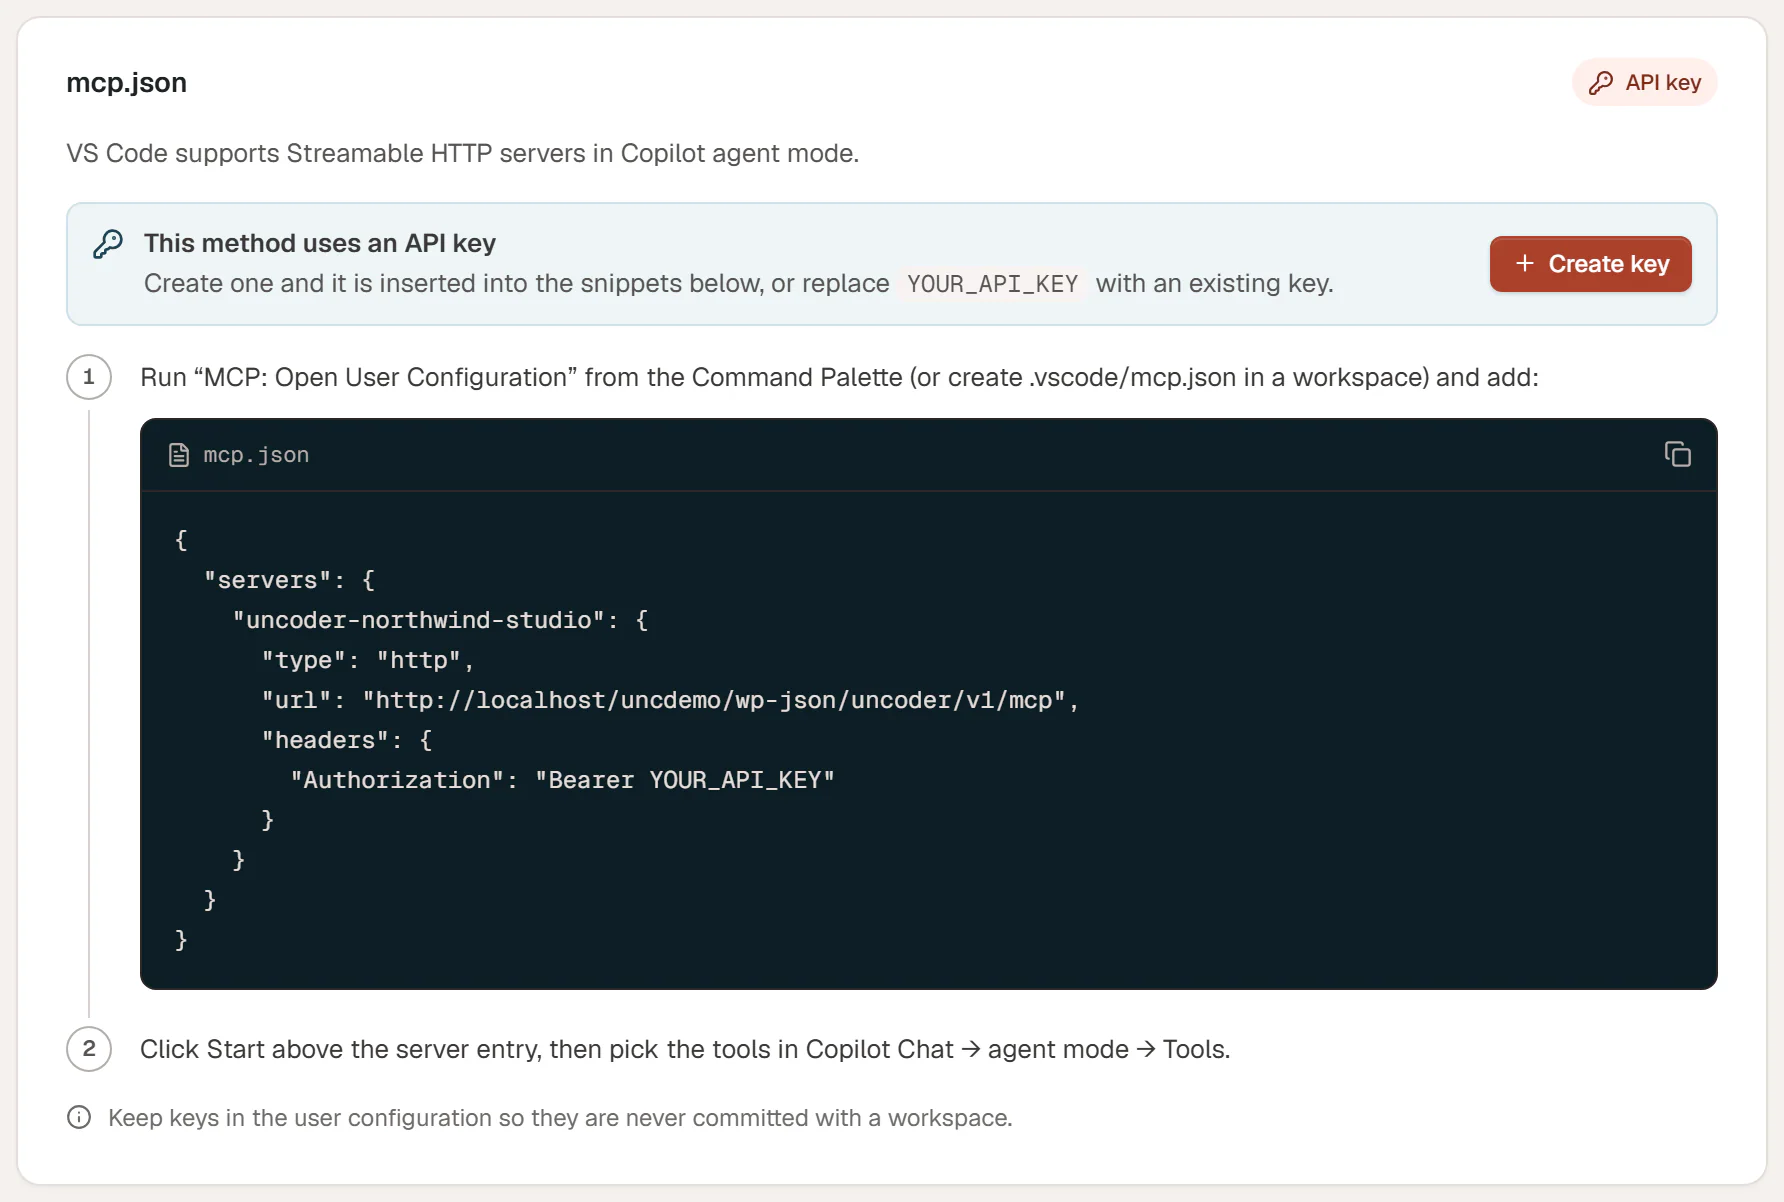
VS Code uses your site's tools in GitHub Copilot's agent mode.
Open the MCP configuration
Run MCP: Open User Configuration from the Command Palette. To use the server only in one workspace, create
.vscode/mcp.jsonthere instead.Add the server
JSONmcp.json{ "servers": { "urmi-my-site": { "type": "http", "url": "https://example.com/wp-json/urmi/v1/mcp", "headers": { "Authorization": "Bearer YOUR_API_KEY" } } } }Start it
Click Start above the server entry. Then open Copilot Chat, switch to agent mode and pick the tools under Tools.
Keep keys in the user configuration so they are never committed with a workspace.
Windsurf
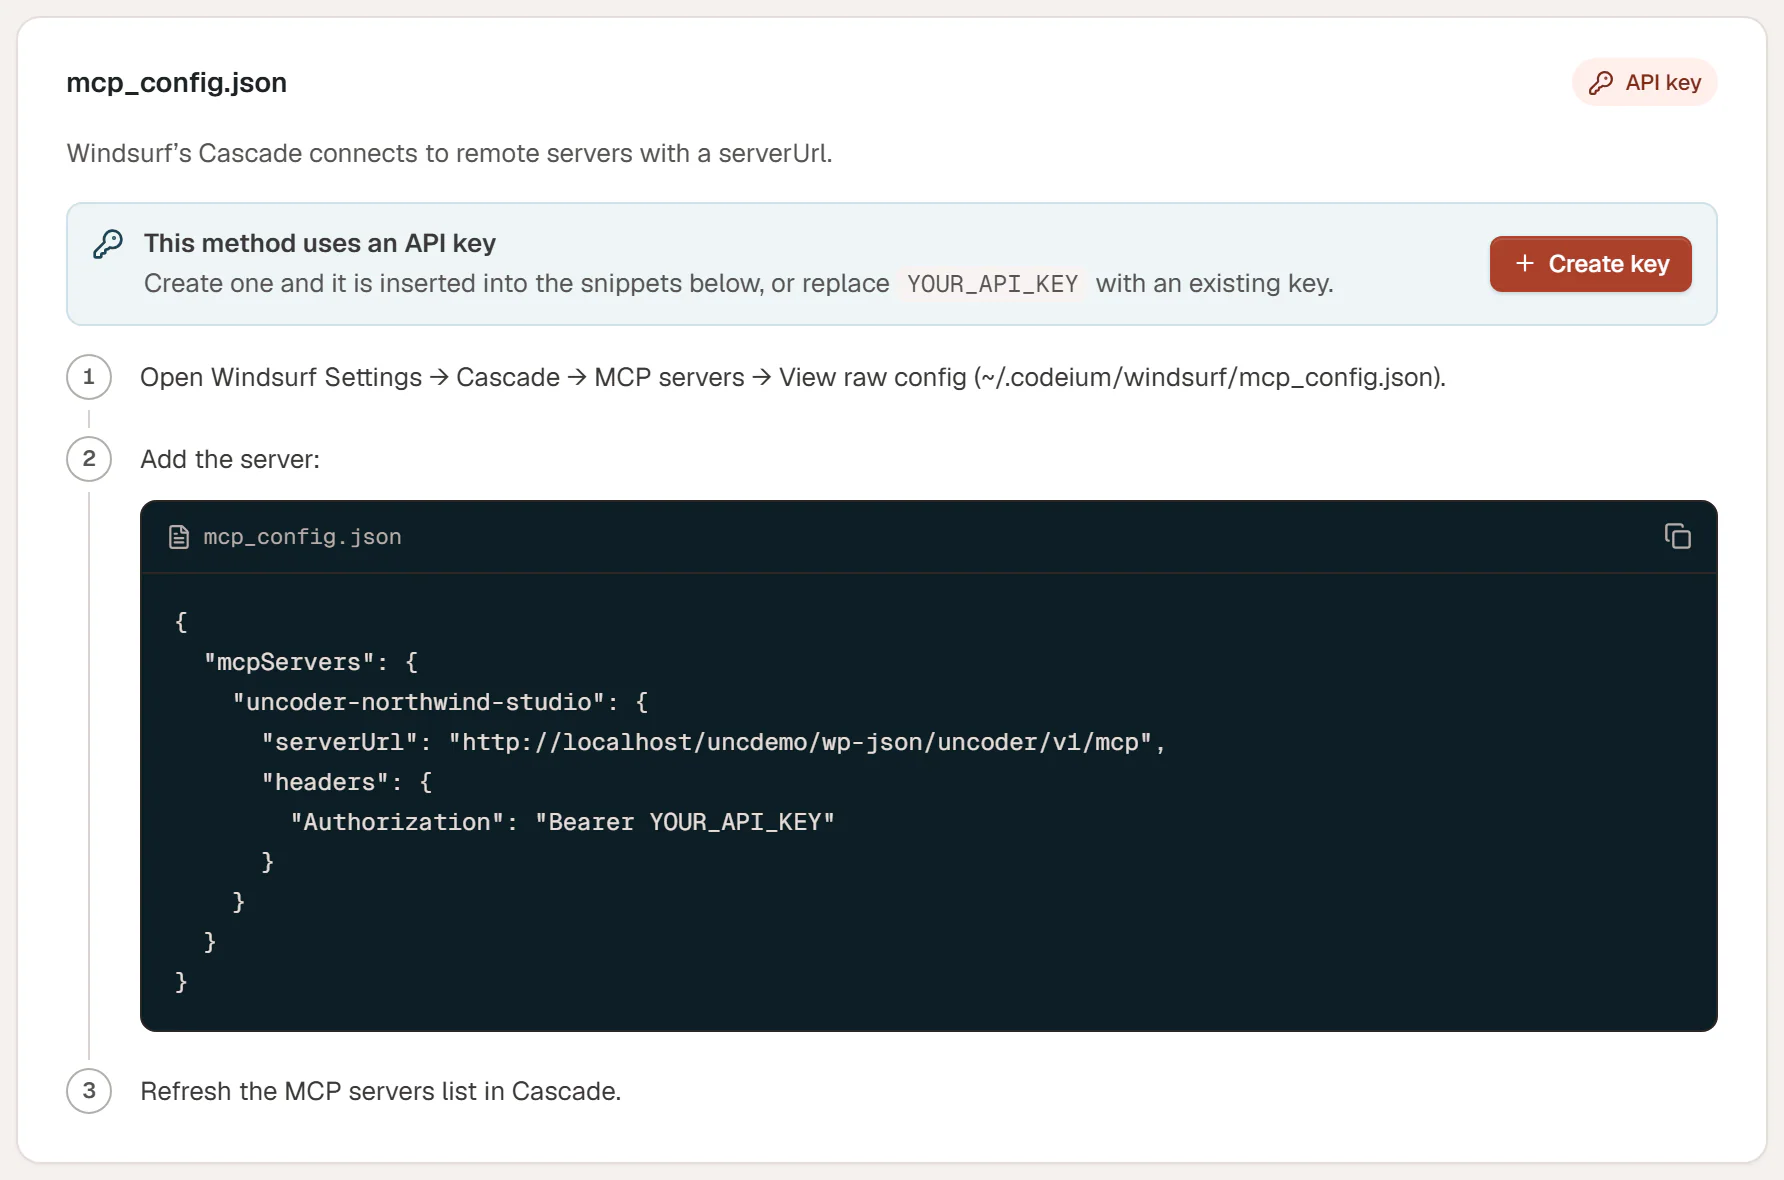
Windsurf's Cascade connects to remote servers with a serverUrl.
Open the MCP config
Open Windsurf Settings → Cascade → MCP servers → View raw config. The file is
~/.codeium/windsurf/mcp_config.json.Add the server
JSONmcp_config.json{ "mcpServers": { "urmi-my-site": { "serverUrl": "https://example.com/wp-json/urmi/v1/mcp", "headers": { "Authorization": "Bearer YOUR_API_KEY" } } } }Refresh
Refresh the MCP servers list in Cascade.
Any other MCP client
Choose Other clients on the Connect a client tab. It has two methods.
Streamable HTTP
Most current MCP clients can talk to a remote server over Streamable HTTP. Give the client:
- the Server URL, for example
https://example.com/wp-json/urmi/v1/mcp - the API key as a bearer token in every request:
Authorization: Bearer YOUR_API_KEY
Clients that support OAuth 2.1 can sign in instead of using a key, like the Claude and ChatGPT connectors. They find the sign-in details on their own from the Server URL. Your site must be public and use HTTPS for that.
stdio bridge
Some apps can only start a local program (a "stdio" server) and cannot connect to a remote address. For those, Urmi offers a small bridge that runs on your computer and forwards everything to your site.
The bridge needs Node.js (opens in a new tab) 18.17 or newer on your computer. npx downloads and runs it the first time.
Use this as the server command in your app, with your own Server URL:
npx -y @wpurmi/mcp --url https://example.com/wp-json/urmi/v1/mcpand pass the key in the URMI_MCP_KEY environment variable. In an app that uses the common mcpServers format, that looks like this:
{
  "mcpServers": {
    "urmi-my-site": {
      "command": "npx",
      "args": ["-y", "@wpurmi/mcp", "--url", "https://example.com/wp-json/urmi/v1/mcp"],
      "env": { "URMI_MCP_KEY": "YOUR_API_KEY" }
    }
  }
}| Option | Environment variable | What it does |
|---|---|---|
--url | URMI_MCP_URL | Your site's Server URL. Required. |
--key | URMI_MCP_KEY | The API key. Prefer the environment variable, so the key does not show up in process lists. |
--header "Name: value" | An extra HTTP header, for example for a staging site behind a password. You can repeat it. | |
--timeout | URMI_MCP_TIMEOUT | How long to wait for your site, in seconds. The default is 120. |
For safety, the bridge refuses to send a key over plain http, except to localhost and addresses ending in .test or .local.
If you already use the generic mcp-remote bridge for other servers, it works too (it also needs Node.js):
npx -y mcp-remote https://example.com/wp-json/urmi/v1/mcp --header "Authorization: Bearer YOUR_API_KEY"Local sites
A site on your own computer (for example http://localhost/… or mysite.test) works with every app on this page, because the app runs on the same computer. Only connectors that run on the AI company's servers, such as the Claude app and ChatGPT, need a public HTTPS site.
Related
- API keys & scopes
- Connect Claude (Claude Code and Claude Desktop)
- Troubleshooting