Export & import templates
Export templates and the Design System to a file, and import them into another site running Urmi.
On this page
A template export is a small .json file with one or more Theme Builder templates, and optionally your Design System. Use it to reuse a header, a popup or a saved section on another site, to share a design with a colleague, or to keep a copy before a big change. Everything you import arrives as a draft, so nothing changes on the live site until you publish it.
To move a whole site, with pages, menus and images, use a site kit instead.
Export one template
Open the Theme Builder
Go to Urmi → Theme Builder and find the template, for example your footer.
Open the row menu
Click the … button at the end of the template's row.
Export
Click Export. Your browser downloads a file named like
urmi-site-footer-2026-09-28.json.
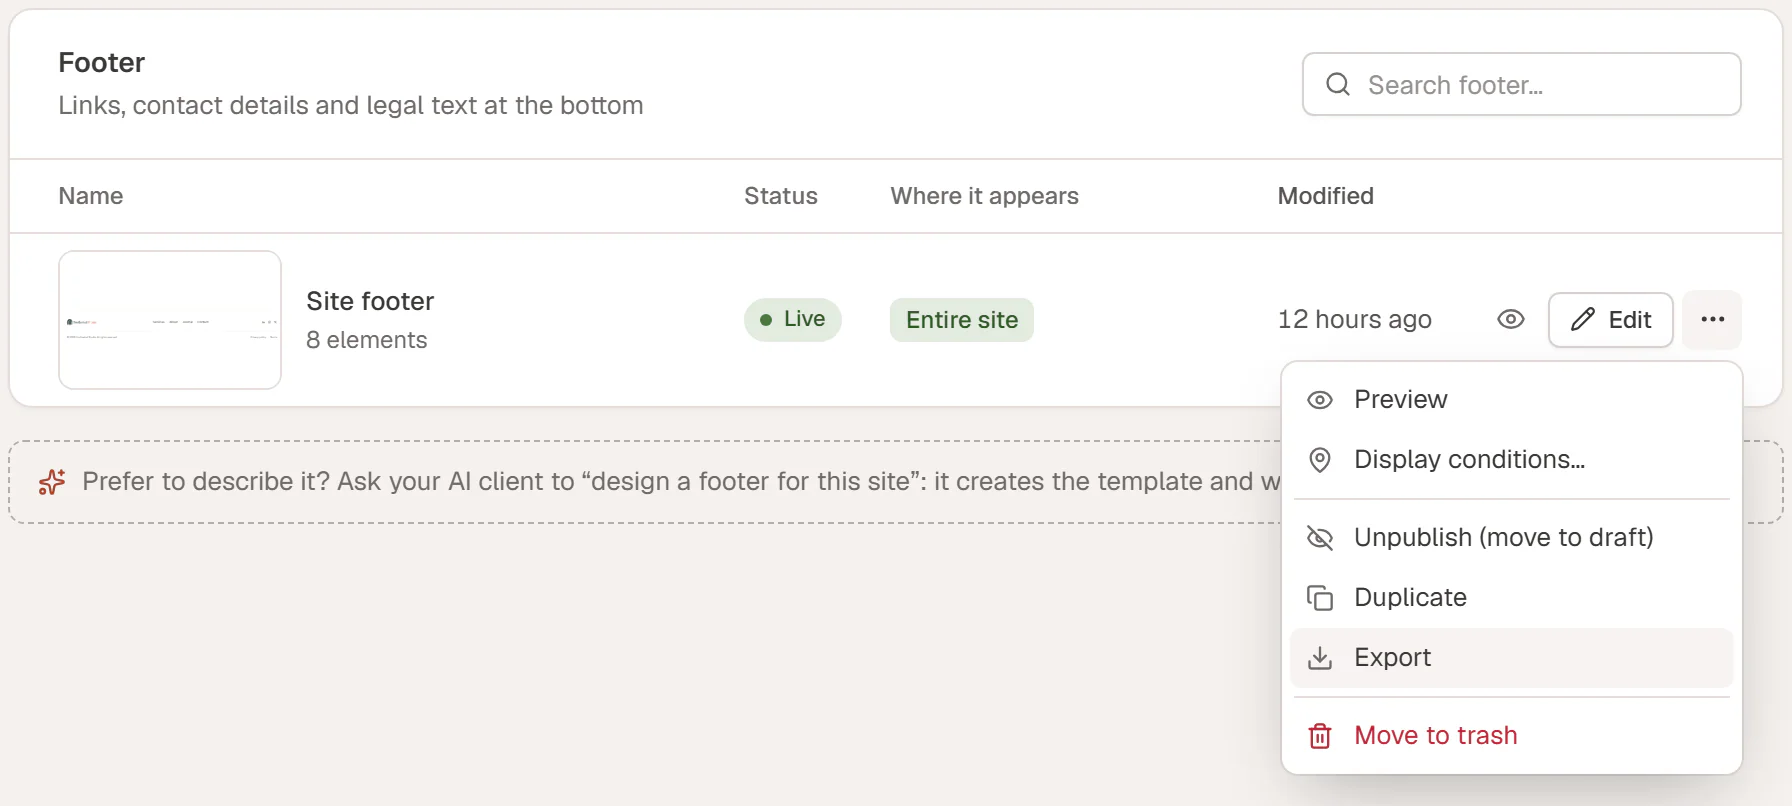
Saved sections work the same way: save a section from the editor with right-click → Save as template, then export it from Theme Builder → Saved sections.
Export all templates and the Design System
Go to Urmi → Settings → Tools and click Export next to Export design (JSON). The file contains your Design System and every template, but no pages, media or menus.
What an export file contains
- the design of each template, its page settings, its display conditions and, for popups, the popup settings
- the Design System, when you exported it
- links to the images used, but not the image files themselves
Webhook addresses of forms (webhook, Slack and Discord) are removed, because they work like passwords.
Import templates
Open the import dialog
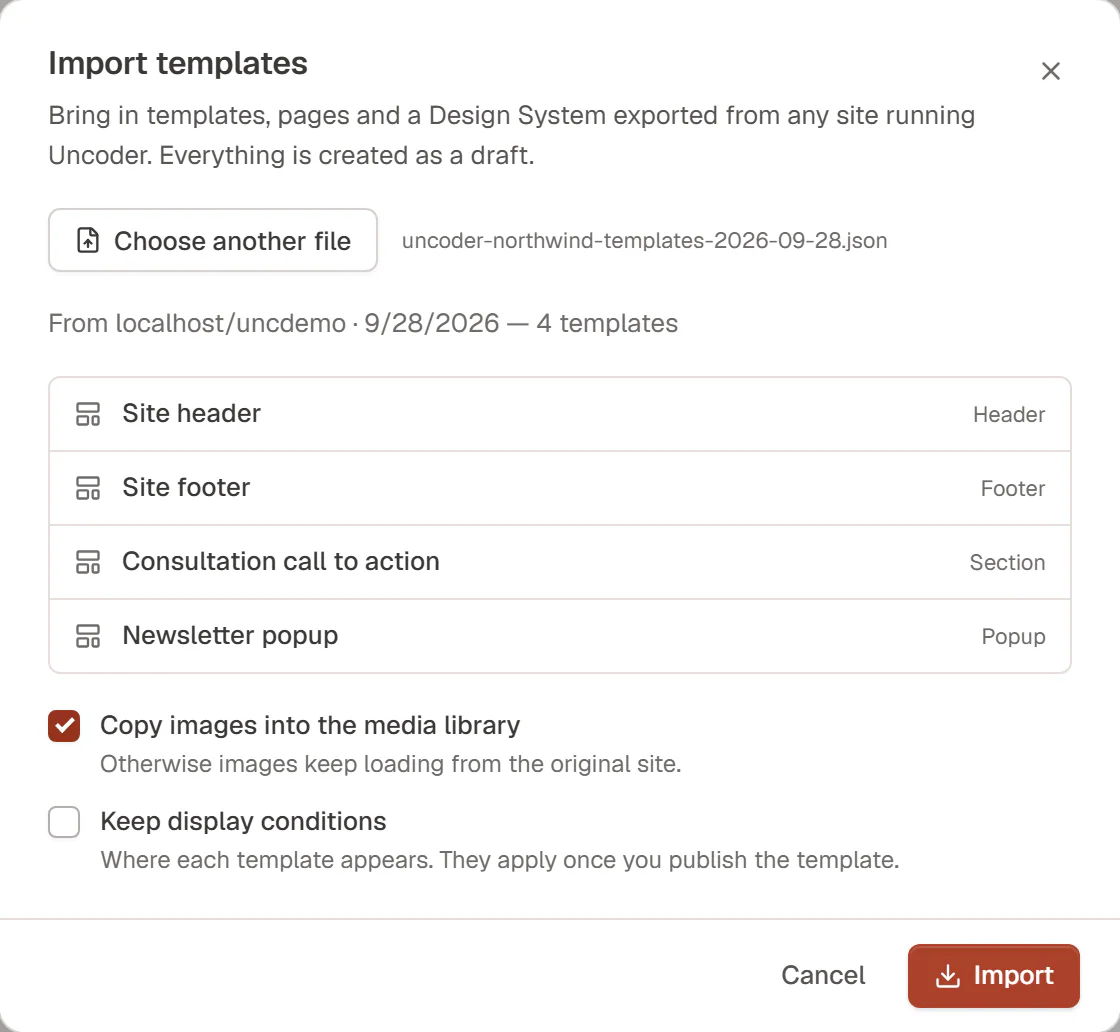
Go to Urmi → Theme Builder and click Import. The same dialog opens from Settings → Tools → Import design → Import….
Choose the file
Click Choose export file and pick a
.jsonfile exported from Urmi (up to 20 MB). The dialog shows where it comes from and lists what is inside.Choose the options
Tick what you want (see below).
Import
Click Import. When it is done, the dialog lists the new drafts with an Edit button for each.
| Option | What it does |
|---|---|
| Copy images into the media library | Downloads the images the templates use into this site's media library. Off: images keep loading from the original site. On by default. |
| Keep display conditions | Keeps where each template appears. The conditions apply once you publish the template. Off by default. Only shown when the file has templates. |
| Replace the Design System | Overwrites this site's colors, fonts, text styles and buttons with those in the file. You can undo it from the Design System history. Off by default. Only shown when the file has a Design System. |
After importing
- Everything is a draft. Open each template, check it and publish it. A header or footer with display conditions goes live when you publish it.
- References are kept. If a template in the file uses another template from the same file, such as a loop item or a saved section, it points to the new copy.
- Check the warnings. If an item could not be imported, for example a template type your account may not create, the dialog says so.
- Images from other sites: if the original site goes offline, images that were not copied stop showing. Import with Copy images into the media library to avoid that.
A file can hold up to 100 items, and up to 60 images are copied per import.
Who can do this
Exporting all templates, importing templates and replacing the Design System need permission to change the theme, which administrators have. Exporting a single template needs permission to edit it.