Custom fonts
Upload your own font files and use them in the Design System and the editor.
If your brand uses a font that is not on Google Fonts, or you prefer to serve every font from your own server, upload it as a custom font. Urmi serves the files from your site, so visitors' browsers make no requests to third parties, and the font appears in every font picker.
Before you upload
- Check the license. Only upload fonts whose license allows self-hosting on the web.
- Prefer WOFF2. It is the smallest format and loads fastest. WOFF, TTF and OTF also work, up to 10 MB per file.
- One file per style. Most fonts come as separate files for Regular, Italic, Bold and so on. A variable font holds a whole range of weights in one file.
Add a font
Open Custom fonts
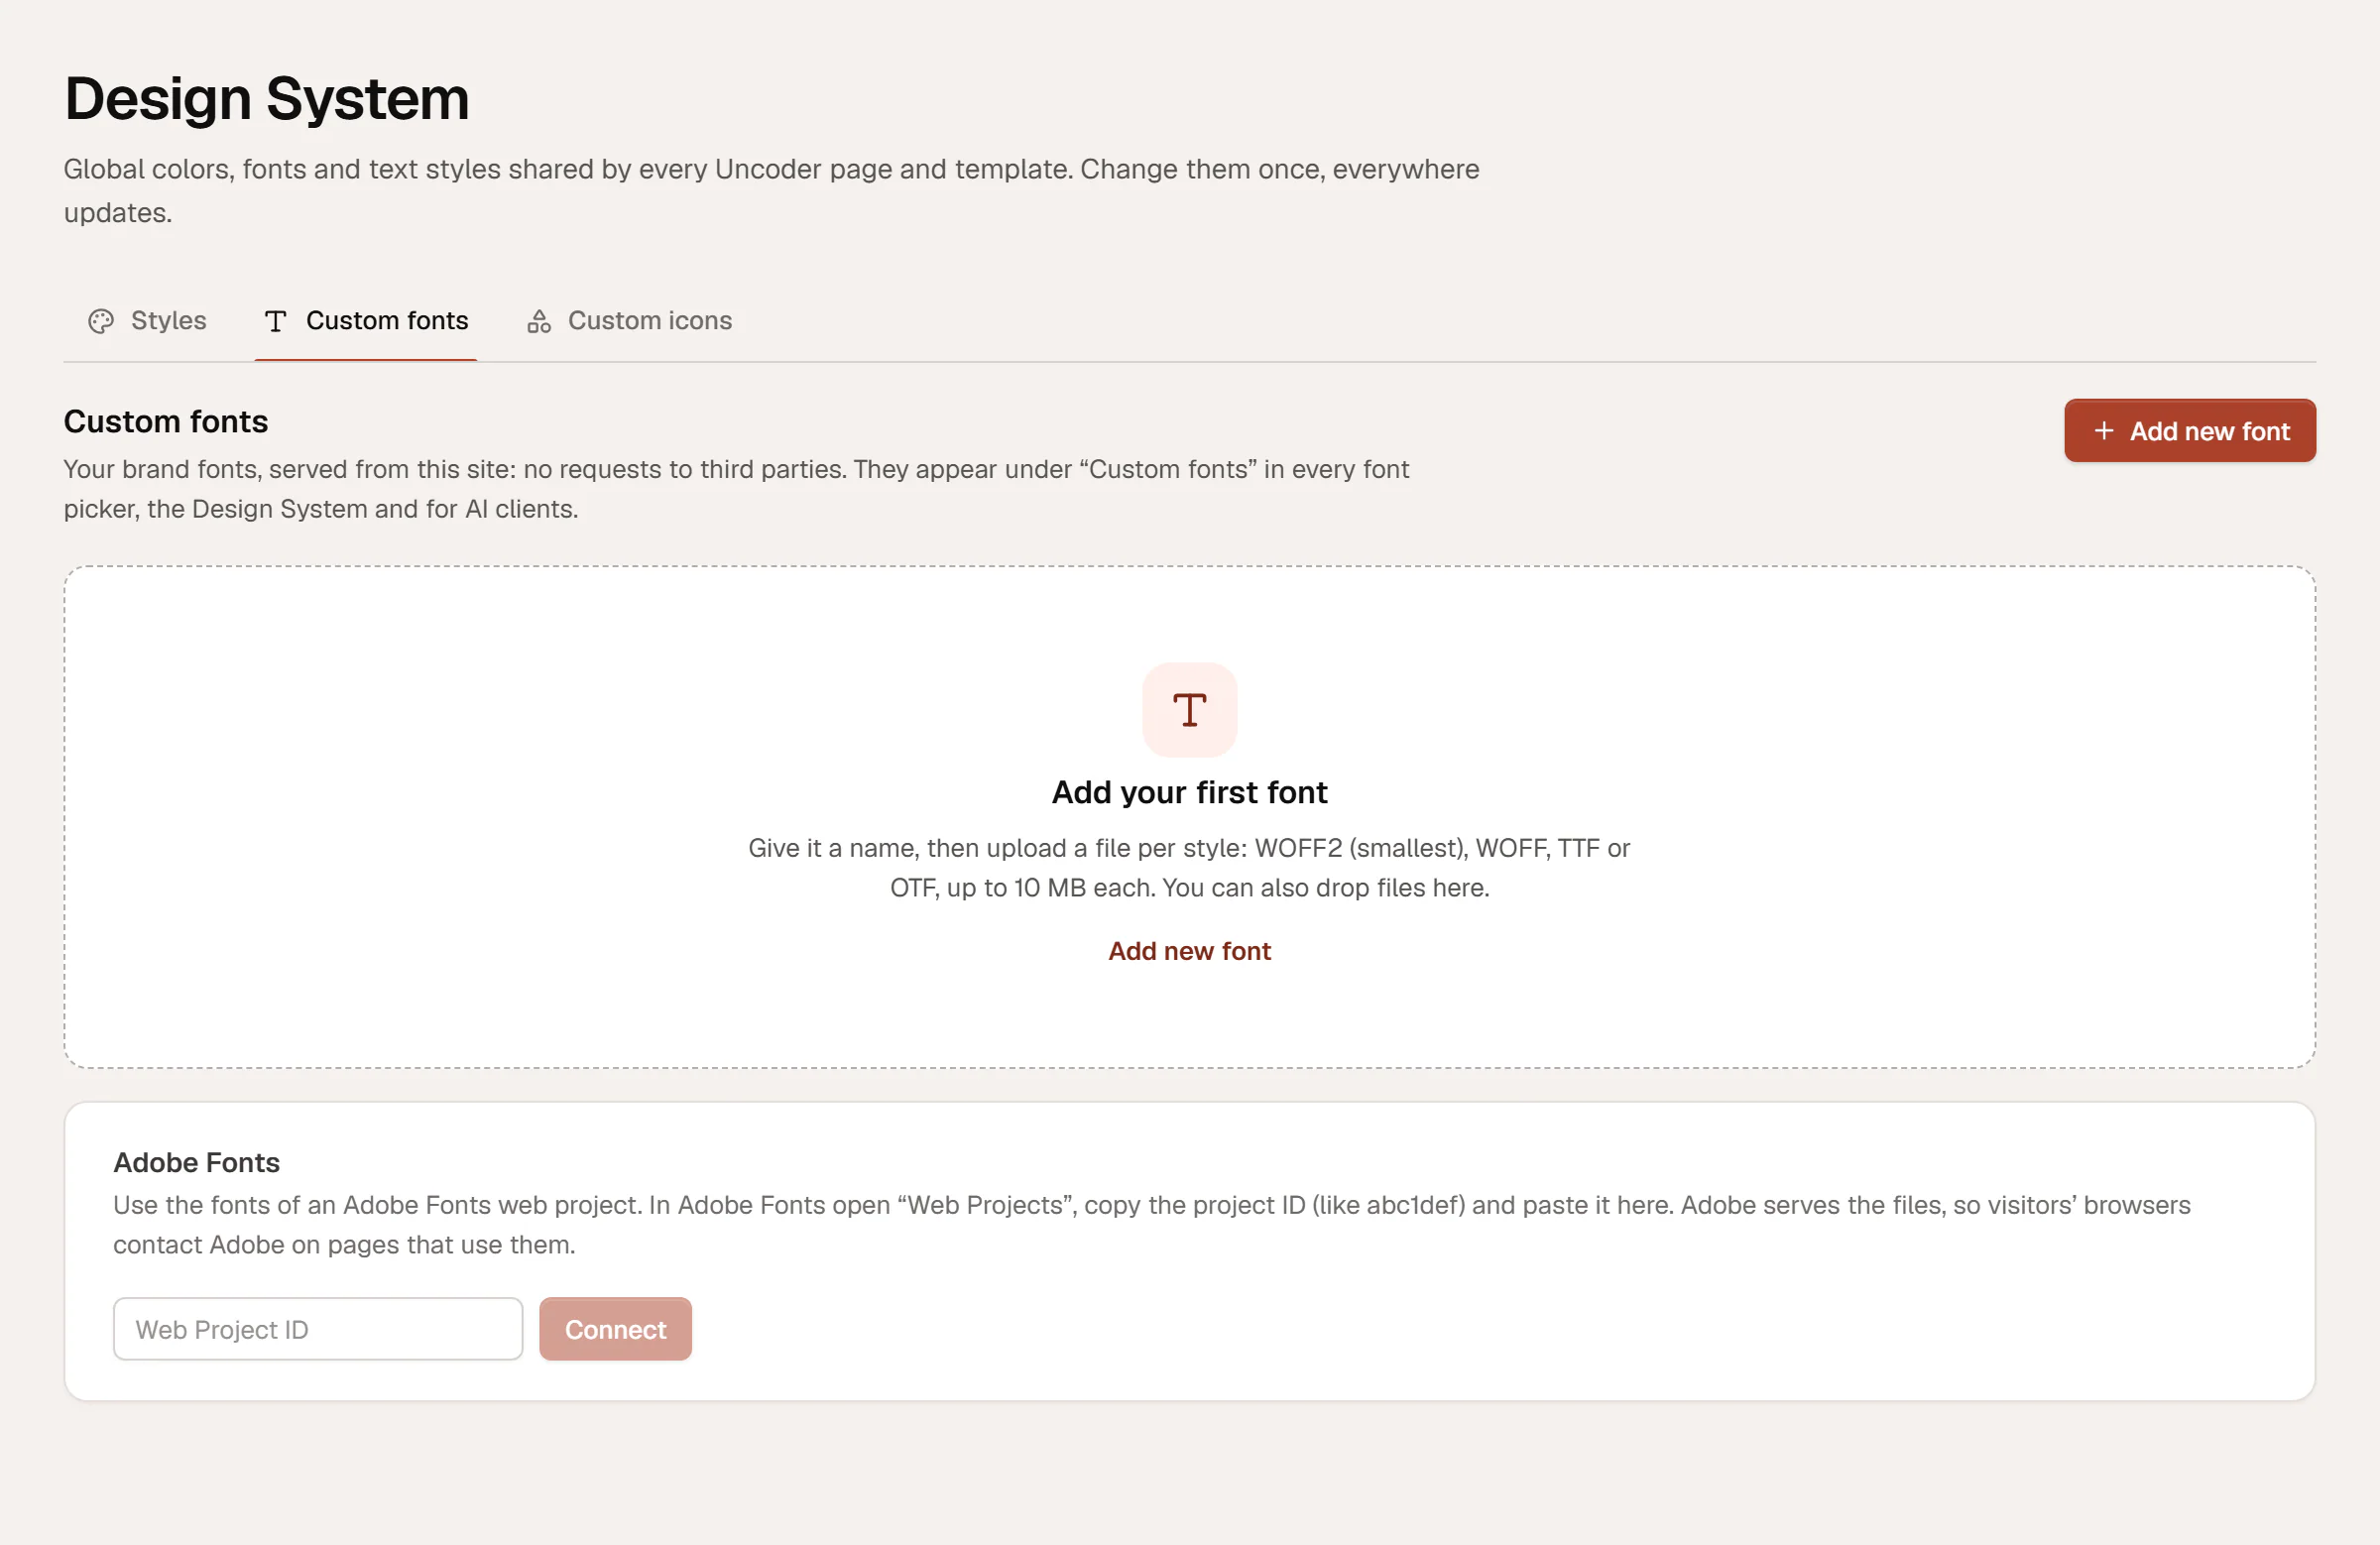
Go to Urmi → Design System and click the Custom fonts tab. Click Add new font (or Add your first font).
Add the files
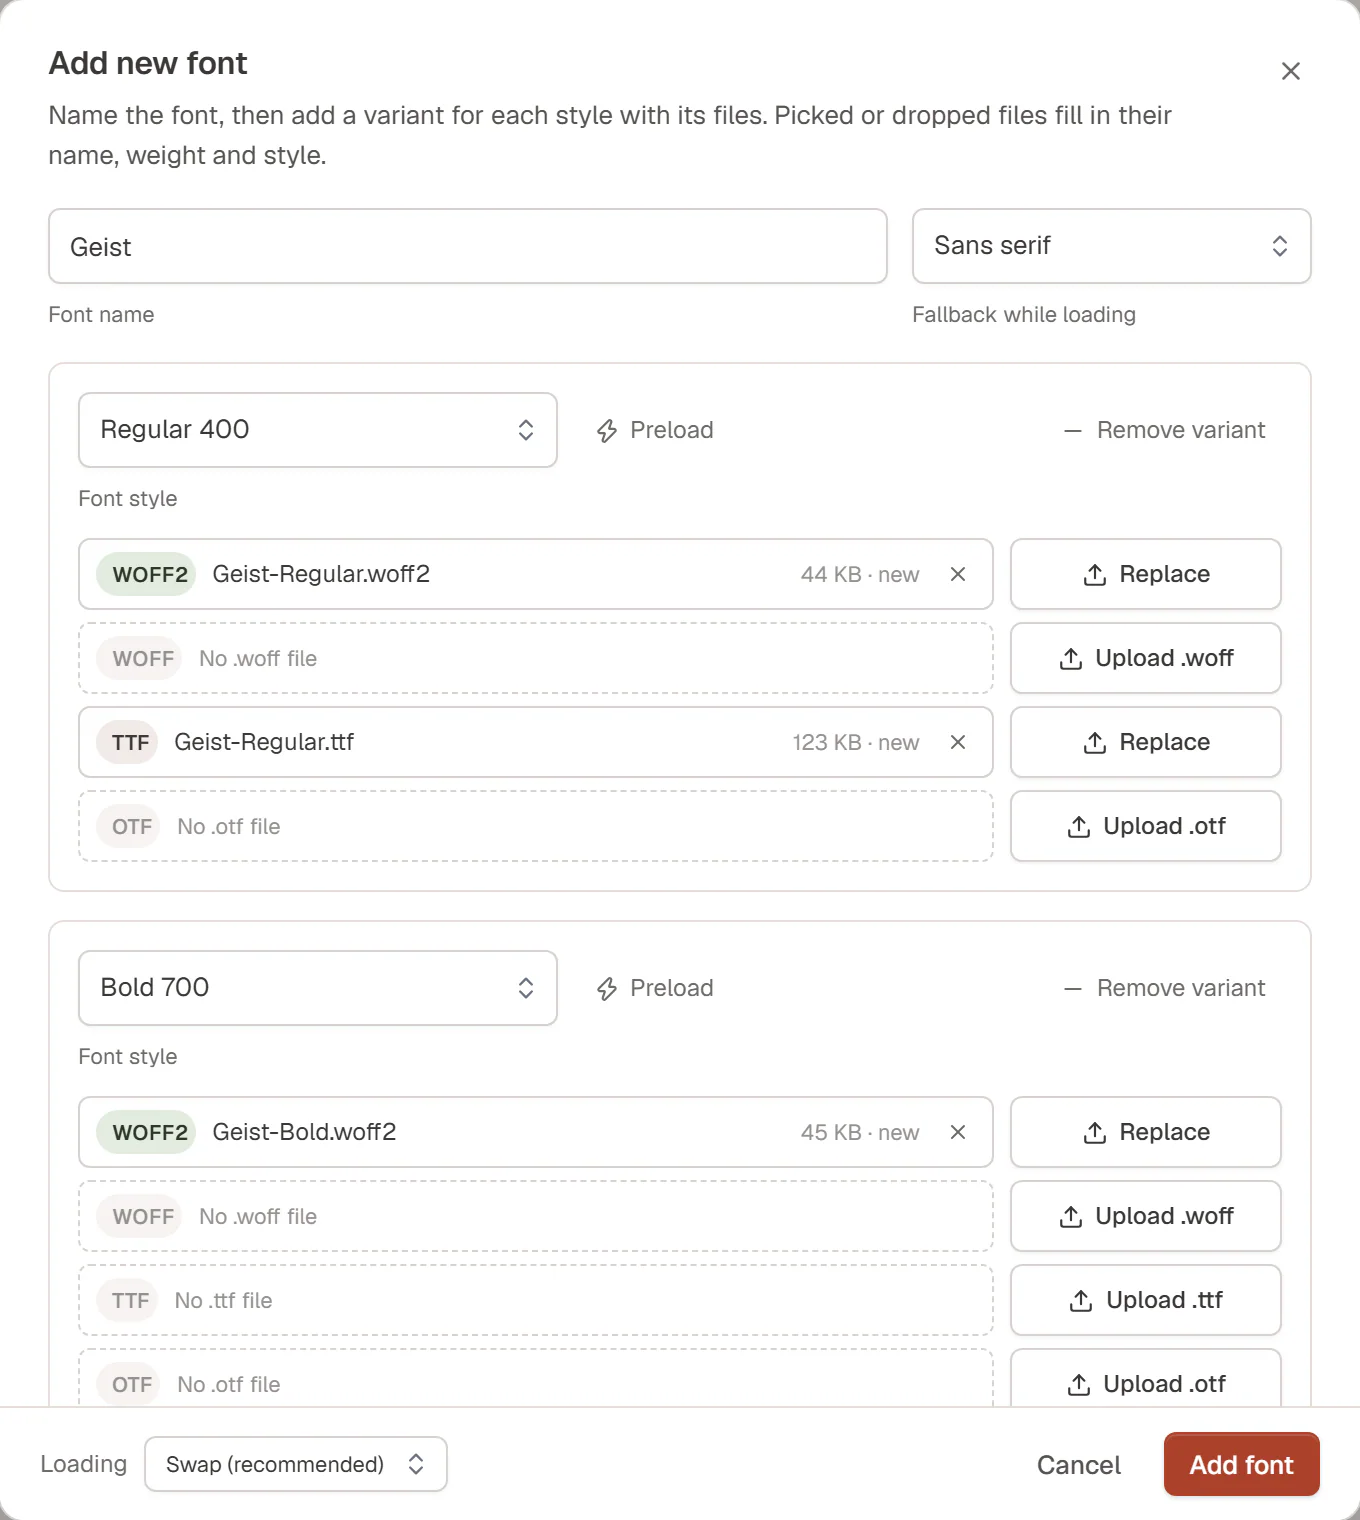
Click an upload button, such as Upload .woff2, or drop the font files onto the dialog. You can add all styles at once: Urmi reads each file and fills in the name, weight and style for you (for WOFF2 files, from the file name).
Check the name and variants
- Font name: the name you pick in font pickers, for example
Brand Sans. - Fallback while loading: the kind of font shown until yours has loaded: Sans serif, Serif, Display, Handwriting or Monospace.
- Each variant has a Font style (Regular 400, Bold 700, an Italic style, or a Variable weight range) and up to four files: WOFF2, WOFF, TTF and OTF. Click Add variant for another style, or Remove variant to delete one.
- Font name: the name you pick in font pickers, for example
Choose how it loads
Loading at the bottom sets what visitors see while the font downloads. Swap (recommended) shows the text at once in the fallback font, then switches.
Save
Click Add font. The files are uploaded and the editor confirms that the font was added.
For a variable font, choose Variable (weight range) (or Variable italic (weight range)) and set Lightest weight and Heaviest weight, for example 100 to 900.
Preload on a variant tells browsers to fetch that file first, so text renders in your font on the first paint. Use it for the style of your body text, one per font.
Use the font
After adding a font, reload any open editor. The font then appears:
- in the heading and body font pickers of the Design System;
- under Custom fonts in every font picker in the inspector;
- for AI assistants connected over MCP.
Manage your fonts
The Custom fonts tab lists each font with its variants and files. Type in Type to preview to see your own text in every style, and drag the size slider.
- A hint appears when a variant has no WOFF2 file, since adding one makes pages faster.
- A lightning icon marks preloaded variants.
- Click Edit to change the name, add or replace files, or change the loading option.
- Click the trash icon and confirm to delete a font. Text that uses it falls back to the system font of its category.
Custom fonts are always served from your site, whatever you choose for Font delivery in Urmi → Settings → General. A custom font with the same name as a Google font replaces it.